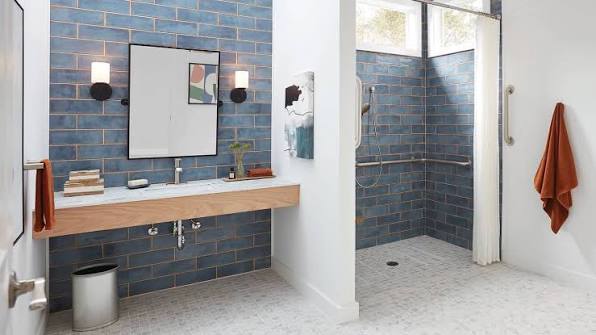

New construction provides an opportunity to incorporate accessibility into the restroom design from the beginning. Unlike renovation work, the project team can coordinate walls, plumbing, fixtures, and circulation before construction limits the available options.
Planning an ADA Bathroom Sink during the early design stage can help prevent conflicts later. Sink dimensions, mounting style, faucet location, knee clearance, and surrounding fixtures should all be considered as part of the complete restroom layout.
Review Accessibility Requirements Early
Accessibility requirements should be incorporated into the architectural and engineering plans before construction begins.
The ADA Standards may apply alongside state, local, and project-specific building requirements. Reviewing all applicable requirements early gives designers and contractors a clear basis for selecting the sink and planning its installation.
Reserve the Appropriate Floor Space
The sink needs sufficient clear floor space for an accessible approach.
Under applicable ADA requirements, a forward approach to a lavatory commonly requires clear floor space of at least 30 inches by 48 inches. The exact arrangement should be verified against the applicable standards and the final restroom layout.
Doors, partitions, toilets, and other fixtures should be considered when reserving this space.
Select the Sink Before Finalizing Plumbing
Sink dimensions can influence the location of water supplies and drainage connections.
Choosing the fixture early allows the plumbing team to coordinate supply lines, drains, traps, shutoff valves, and other components with the actual product.
This can reduce the need for field modifications during installation.
Plan the Finished Sink Height
Finished height should be established during the design stage rather than adjusted after construction.
For installations subject to the ADA Standards, accessible lavatories and sinks are generally limited to a maximum height of 34 inches above the finished floor.
The design should account for finished flooring, counter thickness, basin dimensions, and mounting components.
Provide Adequate Knee Clearance
The area beneath the sink should be included in the architectural layout.
Cabinetry, supports, plumbing, and other components can reduce the usable space beneath the basin. New construction makes it easier to design these elements around the required knee and toe clearance.
A three-dimensional review can also help identify potential conflicts before walls and finishes are completed.
Choose a Suitable Mounting Configuration
Wall-Mounted Sinks
Wall-mounted models can provide open space beneath the basin and may work well in accessible restroom layouts.
The wall framing should include adequate reinforcement for the selected sink and mounting system.
Countertop Sinks
Countertop configurations can provide a coordinated appearance and may be suitable when an accessible vanity or counter is part of the design.
The supporting structure must be planned so it does not interfere with the required clearance beneath the sink.
Coordinate Faucet Placement
The faucet should be considered during the sink selection process.
Controls should be positioned within an appropriate reach range and should be operable without unnecessary force. Lever, push, or sensor-operated designs can be considered depending on the facility and project requirements.
The faucet should also be compatible with the sink’s mounting configuration.
Plan Plumbing Protection
Accessible sinks may have exposed plumbing beneath the basin.
Hot water pipes and other potentially hazardous components should be protected as required while preserving the necessary knee and toe clearance.
Because new construction allows plumbing to be routed before walls are closed, the project team can plan a cleaner and more functional arrangement.
Coordinate Nearby Accessories
The sink area should be designed together with other restroom elements.
Consider the placement of:
- Mirrors
- Soap dispensers
- Hand dryers
- Paper towel dispensers
- Waste receptacles
- Grab bars
- Signage
Accessories should not reduce required clearances or interfere with the intended approach to the sink.
Consider Restroom Circulation
The sink may meet its individual dimensions while the overall restroom still has circulation problems.
Review door swings, pathways, toilet locations, partitions, and other fixtures as part of the complete floor plan.
This approach helps ensure that the accessible sink remains usable once every component has been installed.
Select Materials for the Facility
New construction also provides an opportunity to choose materials according to the building’s long-term needs.
Consider expected traffic, cleaning frequency, moisture exposure, impact resistance, appearance, and maintenance requirements.
For a high-traffic commercial facility, durability may be more important than selecting a material based solely on appearance.
Review Structural Requirements
Mounting requirements should be coordinated with wall construction and framing.
Wall-mounted sinks may require blocking or reinforcement that needs to be installed before drywall or other finishes are completed.
The sink manufacturer’s installation instructions should be reviewed so structural provisions are included in the construction documents.
Consider Future Maintenance
Accessibility planning should extend beyond the day the building opens.
Maintenance staff may need access to faucets, drain assemblies, supply lines, sensors, or other components. Providing practical service access can make future repairs easier.
Product documentation should also be retained so replacement parts and maintenance procedures can be identified when needed.
Avoid Common Planning Mistakes
Early coordination can prevent several common problems.
Watch for:
- Selecting the sink after plumbing plans are finalized
- Failing to account for finished floor height
- Allowing cabinets to block knee clearance
- Placing accessories inside required clear floor space
- Ignoring wall reinforcement requirements
- Choosing an incompatible faucet
- Routing plumbing where it interferes with user clearance
- Treating the sink separately from the overall restroom layout
These issues are generally easier to correct on drawings than during construction.
Coordinate With the Construction Team
Architects, engineers, contractors, plumbers, and interior designers should work from the same approved fixture information.
Any changes to the sink model, mounting system, countertop, or faucet should be reviewed before installation.
King Konree product specifications can be included in the project’s fixture documentation when applicable, allowing the construction team to coordinate dimensions and installation details with the selected product.
Conduct a Pre-Installation Review
Before the sink arrives on site, verify that the rough-in locations, wall support, finished floor levels, and surrounding construction match the approved plans.
Confirm the sink dimensions and mounting requirements one more time before installation.
This final coordination step can help prevent delays caused by incompatible site conditions.
Complete a Final Accessibility Check
After construction is complete, inspect the actual installation.
Check the finished height, clear floor space, knee and toe clearance, faucet operation, plumbing protection, mounting stability, and surrounding circulation.
If construction changes were made during the project, verify that the finished restroom still meets the applicable accessibility requirements.
Final Thoughts
New construction offers the greatest opportunity to integrate accessible sink requirements into the restroom from the start. Careful planning can reduce conflicts between the sink, plumbing, structure, accessories, and surrounding circulation.
By coordinating fixture selection, dimensions, clearances, and installation details before construction begins, project teams can create a restroom that supports accessibility while remaining practical to build, maintain, and use.