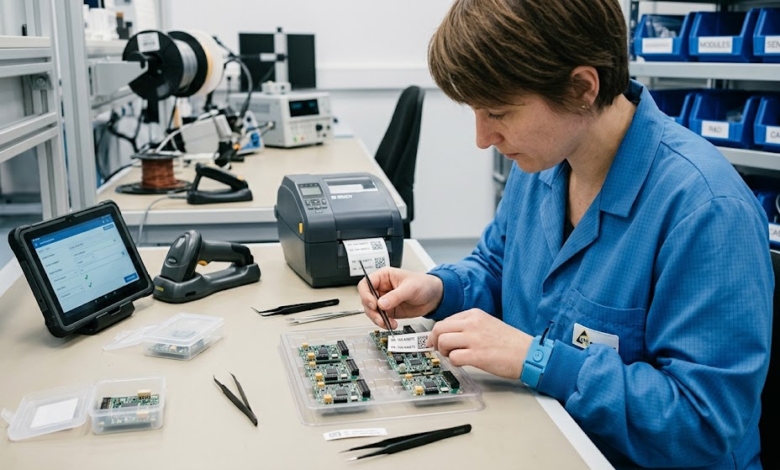

A serialized part label should identify one physical unit and connect it to a reliable record of receipt, storage, installation, return, or repair. It must not merely print a number that looks unique. The key decisions are when the serial is assigned, which carrier holds the label, and how a damaged label is replaced without creating a second identity. Start with the actual service journey and the time the mark must remain readable. A short-lived direct thermal label may suit a protective bag, while the part itself may need a more durable identifier.
Decide what the serial identifies
One SKU can cover thousands of interchangeable parts, while each serialized unit has its own history. Keep SKU, serial number, manufacturing lot, and warehouse location as separate fields. A single barcode may encode a unit identifier that resolves to the other fields in software, but the human-readable line should let staff distinguish similar parts when a scanner is unavailable. Define whether the serial is provided by the manufacturer or assigned at receiving. Never issue a new serial merely because an old label is hard to read.
At receipt, scan the manufacturer’s mark when present and compare it with the supplier’s paperwork. If your organization adds an internal serial, record the relationship between the two. This is especially important when a warranty claim or service bulletin uses the manufacturer’s number. An elegant internal label cannot replace a broken identity link.
Put the label on the right carrier
Some spare parts are oily, hot, small, irregular, or destined for cleaning. An ordinary adhesive label may not be suitable directly on the component. Use a sealed parts bag, rigid tray, protective carton, or attached tag that stays with the unit through its controlled workflow. If the carrier can be separated from the part during inspection, define a scan-and-verify step before that happens. A label on a shelf bin identifies the location, not necessarily the exact unit inside.
Measure the flat area on the finished carrier. Keep the code away from bag seams, folds, hinges, and abrasion points. If a part must remain in storage for years, test the image life or choose a durable marking technology. Use serialized thermal labels for the period they can be shown to survive, rather than assuming a short-life warehouse label is a permanent asset plate.
Print from one authoritative record
The label software should retrieve the serial and product description from the inventory or service system. Prevent free typing of a serial except under a controlled exception process. At receiving, print only after the physical unit and its source document agree. At installation, scan the part and the work order so the record shows which serial went into which asset. If a part is returned, preserve that serial and update its status instead of generating a new label with a new identity.
When several labels are printed in a batch, check that every serial is present once and only once. A skip, duplicate, or misordered sequence can make a stack of correct-looking labels dangerous. Printing at the point of application is often safer for serialized units because the worker can verify each physical part before the next label is issued.
Handle rework and replacement labels
A torn bag or faded label needs a recovery procedure. Retrieve the original serial using a second trusted mark, manufacturer record, or controlled documentation. Compare the physical part with its record before reprinting. Log the reprint and remove the obsolete label or carrier from the active workflow. If the part cannot be identified confidently, quarantine it. Guessing a serial based on shelf position can contaminate installation and warranty history.
Rework may change a part’s status from available to under inspection or rejected. Decide whether a temporary status label is needed, and ensure it cannot be confused with the unit ID. The permanent serial relationship remains the same even when the part’s condition changes. If a component is disassembled into serialized subparts, record the parent-child relationships rather than copying the parent label onto every piece.
Test the full route, not just the print
Print samples with the smallest barcode and longest serial expected. Apply them to actual bags and trays. Scan at receiving, storage, picking, service, and returns using the readers at those stations. Include a package that is opened and resealed, a label that is deliberately damaged, and a part that is moved to another carrier. The test should show whether staff can recover the correct serial without inventing a new one.
Measure mis-scans, reprints, lost-carrier incidents, and time to resolve exceptions. If a code scans on a flat desk but fails through a wrinkled bag, change the placement. If direct thermal barcode labels lift from one bag film, test that exact film and adhesive combination. If the label stays on the bag but the bag is routinely discarded before installation, the process needs a different identity handoff.
What to give a supplier
Provide the printer model, roll geometry, barcode type, required print size, carrier material, expected storage life, temperature and handling conditions, and whether the label must be removable. Ask for production-roll samples. A supplier can help match facestock, adhesive, liner, and winding, but cannot define your serial policy. Keep the approved sample, template, and scan criteria together so a future packaging or printer change triggers a focused retest.
Serialized labeling succeeds when each physical unit has one controlled identity, every transfer preserves that relationship, and a damaged label can be replaced without rewriting history. That is the standard against which material and workflow choices should be judged.
Verify the serial at the handoff point
The critical control is not simply printing the correct serial; it is proving that the correct label stayed with the correct part. At packing, scan the part or its work order and then scan the applied label. Reject a mismatch before sealing the box. For small loose parts, use an inner bag or tray whose identity remains linked to the part during picking. If the part is removed for inspection, scan it back into the same record before returning it to stock. Record the employee, timestamp, and reason whenever a serial label is replaced. That history allows a later warranty or recall inquiry to follow the item without treating every replacement sticker as a new part.