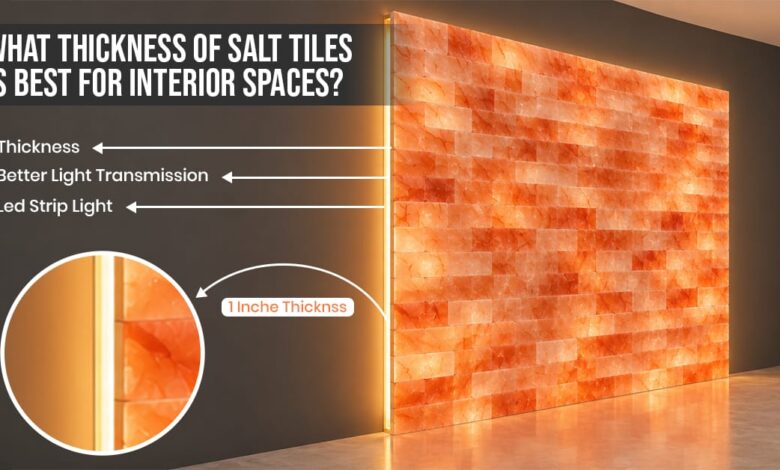

Quick answer: Himalayan salt wall adhesive is a transparent glue made to bond salt bricks, tiles and blocks to a backing surface. To use it, prepare a clean, dry, flat, load-bearing backing, dry-fit the bricks, apply vertical beads of adhesive to the back of each brick, press it into place and let it cure for 24–48 hours. One tube of Saltite Adhesive covers about 30 standard 8 × 4 × 2 inch bricks.
Key takeaways
- Use an adhesive made for salt, not general-purpose glue or tile adhesive.
- The wall behind the bricks must carry the load: about 5.2 lb per brick, roughly 26 lb per square foot.
- Plan one tube per 30 bricks, then round up: 100 bricks need 4 tubes.
- Dry-fit first, work in small sections and do not move bricks while the adhesive cures.
- Salt adhesive is not waterproof. Keep salt away from direct water and control humidity.
What Is Himalayan Salt Wall Adhesive?
Himalayan salt wall adhesive is a specialist glue used to attach Himalayan salt bricks, tiles and blocks to a wall backing. It is sold in cartridges used with a standard caulking gun, and the clear formula is designed so that glue lines are hard to see, which matters when the wall is lit from behind.
It does four jobs:
- Secure bonding: holds bricks and tiles on a suitable backing.
- Alignment: keeps each brick in its planned position while it cures.
- Clean appearance: a transparent formula reduces visible residue.
- Stability: reduces movement when used as the manufacturer directs.
In short, it is part of the system that keeps a salt wall straight, secure, and good-looking for years. Related: How to Build a Himalayan Salt Wall.
Why Can’t You Use Regular Glue on Salt Bricks?
You should use salt-specific adhesive because salt is porous, dissolves in water, and reacts differently from ceramic or stone. A retailer Q&A on a general-purpose construction adhesive for salt walls recommended a salt-specific product instead, and a European salt-spa project report noted that the adhesive had to be transparent and chemically inert to the chlorides in natural salt.
In practice, regular glue can:
- bond poorly or unevenly to salt;
- leave visible, discoloured lines on a backlit wall;
- fail over time as humidity moves through the salt.
Always check that the adhesive manufacturer states compatibility with both Himalayan salt and your backing.
Salt Adhesive vs Construction Adhesive
| Option | Best for | Limits |
| Salt-specific transparent adhesive | Bonding bricks, tiles and blocks directly to a backing | Not waterproof; follow cure time and load rules |
| Standard tile adhesive | Ceramic and stone tile | Not designed for salt; may stain or bond poorly |
| General construction glue | Wood, metal and general repairs | Not recommended for salt walls |
| Mounted panel systems (snap-fit or hanging) | Ready-made salt wall panels with lighting | Follows the maker’s installation guide; different method |
Why Do Himalayan Salt Walls Need Special Saltite Adhesive?
Himalayan salt walls need a specially formulated adhesive because Himalayan salt bricks have unique bonding requirements and must be securely attached to a suitable backing surface. The right adhesive provides reliable bonding, maintains brick alignment, reduces visible residue, and supports a clean, stable salt wall installation.
The main functions of the right adhesive are:
- Secure bonding: Helps to place salt bricks and tiles onto suitable backing surfaces.
- Straight alignment: Keeps each part of the salt bricks in its planned position.
- Clean look: The result of a clear (transparent) formula helps to reduce visible residue.
- Material match: It’s mainly designed to be used with Himalayan salt products.
- Stability: Helps reduce undesirable movement with appropriate usage.
How to Apply Himalayan Salt Wall Adhesive
To apply the adhesive correctly, prepare the backing, dry-fit the bricks, load the cartridge, apply vertical beads to the back of each brick, press it into place, let it cure and inspect the result. Follow the manufacturer’s data sheet for bead size, spacing and quantity.
Step 1: Prepare the wall surface
- Remove dust, oil, loose paint and dirt.
- Repair broken or weak areas.
- Make sure the surface is dry, flat and secure.
- Check the framing and support system.
- Confirm the structure can carry the finished weight.
Warning: Do not assume ordinary drywall can hold a heavy salt wall. Use a backing and framing system designed for the load.
Step 2: Dry-fit the bricks
Lay bricks out without adhesive to check corners, edges, spacing and alignment. Measure the wall, mark reference lines and fix problems now. Dry-fitting lets you decide where cut or partial bricks go before any glue is applied.
Step 3: Load the cartridge and test the flow
- Put the cartridge into a compatible caulking gun.
- Cut the nozzle tip as the product instructions say.
- Test the flow on scrap material.
- Apply steady, controlled pressure.
- Keep the nozzle clean while you work.
- Wear gloves and read the label and SDS before use.
Step 4: Apply the adhesive in vertical beads
Hold the brick with its back face toward you and run straight vertical beads of adhesive from the top of the back face to the bottom. Repeat in parallel beads if the product instructions call for it, covering the bonding area without going onto visible edges.
Vertical beads spread the adhesive evenly, reduce waste and limit squeeze-out, which is adhesive pushed out around the edges. Do not over-apply. Bead number, size and spacing must match the manufacturer’s approved instructions, because one pattern does not suit every brick size and system.
Step 5: Position and press the brick
- Place the brick on the prepared backing against your reference lines.
- Press firmly and evenly.
- Level and straighten it.
- Keep joints even with spacers.
- Do not shift it after placing it.
- Remove visible residue only with a manufacturer-approved method.
- Work in small sections so alignment stays accurate.
Build order depends on your support structure and mounting method. Many installers start from the bottom row and work up.
Step 6: Let the adhesive cure
Installation guidance gives 24–48 hours for full curing. Confirm the time on your current product label, because conditions affect it. While it cures:
- do not move or adjust the bricks;
- keep the area dry and keep water away;
- do not add extra weight too early;
- follow the recommended room conditions.
A surface that feels dry is not necessarily ready to carry the full wall load.
Step 7: Inspect the finished wall
Once fully cured, check straightness, joint width, security, cleanliness, exposed adhesive strings and any brick movement. Confirm the support structure is secure before you finish the project or switch on lighting.
How Many Salt Bricks Can One Tube of Saltite Adhesive Cover?
1 tube of Saltite Adhesive covers up to about 30 standard Himalayan salt bricks (8 × 4 × 2 inches), based on Pink Salt Wall’s product specifications.
Formula: Tubes needed = Total number of bricks ÷ 30, rounded up.
| Number of standard bricks | Estimated tubes needed |
| 30 | 1 |
| 60 | 2 |
| 90 | 3 |
| 100 | 4 |
| 150 | 5 |
| 300 | 10 |
| 500 | 17 |
| 1,000 | 34 |
What Should You Check Before Installing a Salt Wall?
Evaluate test backing, adhesive match, brick size, application, structure, and curing time + moisture control.
| Factor | What you need |
| Wall backing | Clean, dry, and structurally stable |
| Adhesive match | Suitable for both the salt and the backing |
| Brick size | Check the size, thickness, and weight |
| Application | Follow the approved bead instructions |
| Structural support | Strong enough for the full wall load |
| Curing | Follow the current product instructions |
| Moisture control | Prevent condensation and direct water contact |
How Long Does Salt Wall Adhesive Take to Cure?
Expect 24–48 hours for full cure, according to the installation guidance for Saltite Adhesive. Some retailer listings quote 24 hours, so always follow the label on your cartridge and your room conditions.
| Stage | What to do |
| During placing | Work in small sections; do not move placed bricks |
| First 24 hours | Keep dry; no adjusting; no extra weight |
| 24–48 hours | Allow full cure before lighting or loading |
| After cure | Inspect, then finish the project |
Using Adhesive on Backlit Salt Walls
A transparent adhesive helps a backlit wall because light passes through the salt without obvious glue lines. Warm white LED light is commonly used to bring out the natural glow of the salt.
- Install and test LED strips, the driver and the controls before any bricks go up.
- Keep adhesive off edges that will be visible.
- Plan access to the driver or power supply.
- Do not block ventilation behind or around the wall.
- In saunas, follow heater clearances, temperature ratings, and manufacturer limits for both the salt and the lighting.
Common Mistakes and How to Fix Them
Avoid common Himalayan salt wall installation mistakes by using salt-specific adhesive, ensuring proper backing, controlling humidity, testing LED lighting, and allowing the adhesive to cure fully.
| Mistake | Result | Fix |
| Skipping the dry fit | Uneven rows and bad corners | Lay out and measure first |
| Using regular glue or tile adhesive | Weak or stained bond | Use salt-specific adhesive |
| Over-applying adhesive | Squeeze-out, visible lines | Follow the bead instructions; wipe only as approved |
| Weak backing | Wall shifts or cracks | Reinforce before installing |
| Moving bricks during cure | Weak bond, misalignment | Leave bricks untouched for the full cure time |
| Ignoring humidity | Dampness, marks on salt | Control ventilation and avoid direct water |
| Not testing lighting | Dark spots and hotspots | Test LEDs before the bricks go on |
| Buying too few tubes | Running out mid-wall | Divide bricks by 30 and round up, plus one spare |
Is Himalayan Salt Wall Adhesive Waterproof?
No. It’s a saltite designed for indoors. It is not recommended for use as Waterproof Adhesive. This Himalayan Salt was very porous and readily absorbed water from the air. If it is used directly on a wall, will salt condense or be affected by high humidity and cause ruin to the wall or the salt and wall? Avoid using Saltite in continually wet conditions.
Conclusion
Himalayan salt wall glue is a kind of glaze made for bonding salt bricks, tiles, and blocks on applicable background materials. Taking proper measures to prepare the surface properly, applying controlled vertical beads, aligning the bricks properly, and providing adequate curing time makes it a positive experience.
Approximately, up to about 30 salt bricks per tube of the Saltite Adhesive. Test Structural Support & Moisture Conditions before project completion.
Frequently Asked Questions
What glue do you use for a Himalayan salt wall?
Use an adhesive made for Himalayan salt, such as Saltite Adhesive. It is designed for bonding salt bricks, tiles and blocks to a suitable backing.
Can I use tile adhesive on salt bricks?
It is not recommended. Standard tile adhesive is not designed for salt and may stain or bond poorly. Use a salt-specific adhesive and check compatibility with your backing.
How do you apply Himalayan salt brick adhesive?
Apply vertical beads to the back of each brick with a caulking gun, press the brick onto the prepared backing and hold it in position. Follow the manufacturer’s bead size, spacing and quantity.
How many bricks does one tube of Saltite Adhesive cover?
About 30 standard 8 × 4 × 2 inch bricks. For 100 bricks, plan 4 tubes. Actual coverage depends on application and conditions.
How long does Himalayan salt wall adhesive take to cure?
24–48 hours for full cure according to installation guidance. Check your product label, as conditions can change it.
Is salt wall adhesive waterproof?
No. It is for indoor use and does not make salt waterproof. Avoid direct water and control humidity.
Is saltite suitable for salt tiles and blocks?
Yes. It is intended for Himalayan salt bricks, tiles and blocks. Check size, backing and coverage requirements before installing.
Can drywall hold a salt wall?
Not on its own. A salt wall can weigh about 26 lb per square foot, so use backing and framing designed for the load and ask a professional if unsure