Tear Off vs. Overlay: How to Choose the Right Path for Your Roof Replacement

When your shingles are curling, granules are washing into the gutters, or flashing has reached the end of its service life, replacement becomes the practical next step. At that point, homeowners usually face one key decision: a full tear-off or a shingle overlay. Both are reroofing methods, but they differ in what gets removed, which components can be upgraded, and how long the new system is likely to perform. Understanding what happens to the roof deck, underlayment, and flashing in each approach helps you compare proposals beyond price and match the method to your home’s roof pitch, framing, and weather exposure.
-
What a Full Tear-Off Reveals and Fixes
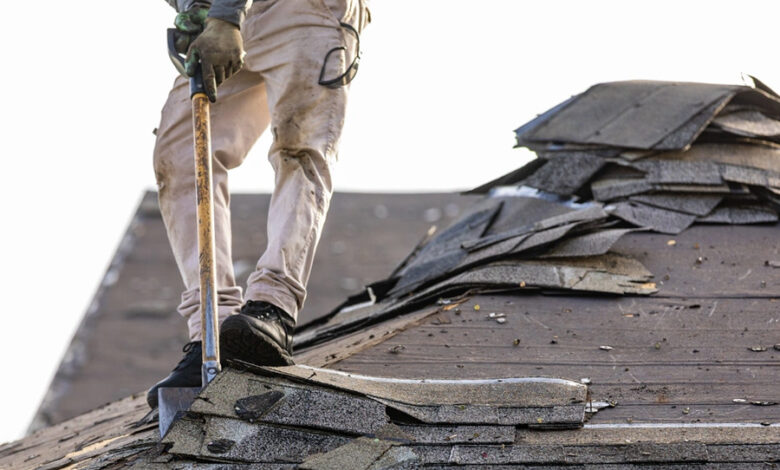
A full tear-off removes the existing shingles, old felt or synthetic underlayment, and edge metals to expose the roof deck, usually OSB or plywood sheathing. With the deck open, crews can replace soft spots where fasteners have lost pull-out strength, correct sagging over rafters, and add proper ventilation pathways before installing new materials. If you are comparing estimates or searching for Local Roofers Near Me, a tear-off typically allows fresh drip edge at eaves and rakes, an ice-and-water membrane in leak-prone valleys, and new step flashing around sidewalls and chimneys.
Because everything is reset, a tear-off lets you make upgrades that matter over decades: switching from 15-pound felt to a high-grip synthetic underlayment, installing a continuous ridge vent paired with clear soffit intake, and using starter strips to improve adhesion at eaves. It also supports precise shingle fastening within the manufacturer’s nail zone, often using a six-nail pattern in high-wind areas. The trade-off is disruption: expect more noise, a dump trailer in the driveway, magnet sweeps for nails, and one to several days of staging and cleanup depending on roof size and complexity.
-
When a Single Layer Overlay Can Be Reasonable
An overlay, sometimes called a layover, installs new shingles directly over one existing layer. It can be reasonable when the current shingles are flat, the deck is sound, and the roof has adequate slope for asphalt shingles, often 4:12 or greater. For example, a one-story ranch with a single layer of flat three-tab shingles, no signs of sheathing deflection, and uncomplicated planes may accept an overlay without telegraphing bumps or creating fastening issues.
Even under those conditions, overlays come with clear compromises. Because the old roof remains in place, crews cannot inspect or replace deteriorated sheathing, and replacing critical metalwork like step flashing becomes difficult. Added weight sits on rafters or trusses, which is a concern in snow-prone regions or on spans already near their design limits. Heat can build between layers, potentially shortening shingle life. Edges are thicker, so drip edge and gutters need extra attention to ensure water sheds cleanly. Overlays also tend to print the pattern of raised tabs and previous nail heads, which can affect both appearance and water flow.
-
Code, Warranty, and Weight Limits You Must Confirm
Before choosing an overlay, check local building codes and manufacturer instructions. Many codes cap asphalt shingles at two total layers and prohibit covering wood shakes or a water-saturated roof. Manufacturers often specify steeper slopes for shingles and may limit wind ratings or warranties when installed over an existing layer. If you live in a high-wind zone, a six-nail fastening pattern and a properly adhered starter course are typically required to meet performance ratings, which may be harder to achieve over uneven substrates.
Structural load matters, too. A second layer adds significant dead load across the roof frame, which can interact with snow or ice in colder climates. Ventilation should also be verified. Without clear soffit intake and an open ridge vent or equivalent high exhaust, moisture can condense beneath the deck, inviting mold and deck delamination. In cathedral ceilings, baffles that maintain an air channel above insulation are critical, and they cannot be added during an overlay without opening the assembly. These constraints do not automatically rule out overlays, but they narrow the set of roofs where an overlay is a prudent choice.
-
Detail Choices That Drive Long-Term Performance
Whichever path you choose, long-term performance depends on attention to details that outlast the shingles themselves. In valleys, a self-adhered ice-and-water membrane under metal valleys is more resilient than woven shingles, where debris collects. At eaves and rakes, continuous drip edge sized to overhang the fascia helps direct runoff into gutters instead of behind them. Around chimneys, reglet cut counterflashing embedded in mortar joints lasts longer than surface-applied flashing cement. Don’t forget pipe boots around plumbing vents and proper sealing around skylight curbs to avoid concentrated leaks under wind-driven rain.
Material selection shapes durability and appearance. Architectural (laminated) shingles typically outlast three-tab shingles and resist wind uplift better. In stormy areas, combine laminated shingles with a six-nail pattern and enhanced starter strips at eaves and rakes to secure the perimeter. Specify corrosion-resistant fasteners, such as hot-dip galvanized or stainless steel, near salt air. Synthetic underlayments resist wrinkles and improve traction during installation compared with felt. Ridge caps designed to match the field shingle add both weather protection and a finished look. Color affects heat absorption; darker shingles absorb more heat, which can affect aging in hot, sunny exposures, especially where ventilation is marginal.
Preparing Your Property for Replacement Day
A well-planned replacement day protects the house and keeps the job moving. Clear vehicles from the driveway so crews can stage materials and a dump trailer close to the roof edge. Move patio furniture and cover sensitive landscaping; ask the crew to use plywood to shield shrubs and tarp plant beds before tear-off. Inside, remove fragile wall decor and cover attic items to catch dust and granules that fall through sheathing gaps during stripping. Keep windows closed during tear-off, secure pets in a quiet room, and plan for higher noise levels as nail guns fire and shingle bundles move across the deck.
Clarify cleanup and closeout before work begins. Ask how many magnet sweeps will be performed, where the trailer will sit, and how gutters will be cleared of granules. Confirm in writing that step flashing, counterflashing, drip edge, and pipe boots are included, and request a diagram showing ridge vents and intake vents to verify a balanced airflow path. After installation, walk the property with the crew lead to spot leftover debris, verify the eaves are free of insulation blocking attic ventilation, and collect material and workmanship warranty documents. In the first few rains, check downspouts for an initial surge of granules and ensure water is moving cleanly through gutters and off valley metal without overflowing.
If your current roof is a single layer in good condition, with adequate slope and confirmed structural capacity, an overlay can be a limited, short-disruption option. In many cases, however, a full tear-off sets the stage for a longer-lasting system by exposing and correcting hidden issues, upgrading underlayment and flashing, and improving ventilation. Whichever route fits your roof, insist on proposals that spell out deck repairs if discovered, underlayment type, valley treatment, flashing details, ventilation components, and fastening patterns so you can compare offers line by line. A clear scope and the right method will do more for your home than any headline warranty ever could.