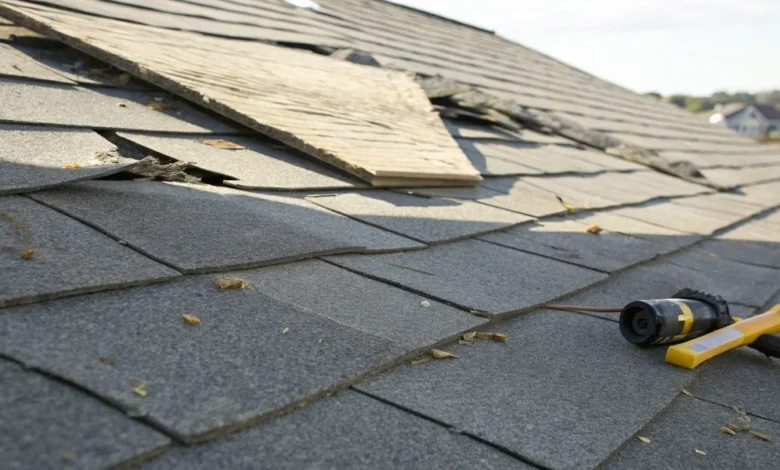
Reading Roof Leak Clues: How Weather, Stains, and Roof Details Point to the Real Problem

A roof leak rarely drips straight down from the source. Water rides rafters, saturates insulation, and follows fasteners before finally showing up as a ceiling stain or damp wall. That is why guessing based on the first wet spot often leads to the wrong repair. Homeowners can narrow causes by pairing what they see indoors with recent weather and the roof details most likely to fail. This article explains how to read those clues, which components deserve the closest look, what checks are safe to do from inside and from the ground, and when a quick patch is not enough because the flashing, vent, or valley needs to be rebuilt.
-
What a Ceiling Stain Actually Tells You
The shape and location of a stain can offer useful clues. A circular, brown ring in the middle of a room often points to a roof penetration such as a pipe boot, skylight curb, or a ridge vent fastener. A long, narrow mark that follows a straight line can be a rafter or truss acting as a water pathway from a higher entry point. Stains near an exterior wall or in a top-floor closet may trace back to the eave, suggesting ice dams, a missing drip edge, or shingle damage at the roof edge. Peeling paint or bulging drywall around a bathroom fan hints at a disconnected or poorly insulated exhaust duct causing condensation rather than a true roof leak.
Water can also move laterally on underlayment and then drop where a drywall seam, can light, or nail head offers a path. That is why two rooms can show spots from a single entry. If your stain shows up after certain storms and then stays dormant, track the timing and wind direction. A focused pattern can help a professional pinpoint the source faster. Once you’ve gathered these observations, you can see how Bealing Roofing can help with roof repairs.
-
Weather Patterns That Narrow the Cause
Different roof failures respond to different conditions. If the ceiling only drips during rain driven by strong winds from one side, lifted asphalt shingles on that slope, a loose ridge vent end cap, or compromised step flashing on a dormer may be letting water blow uphill. If moisture appears after a long, gentle rain, suspect slow seepage at a valley where debris forces water against the valley metal or a worn underlayment allows capillary action beneath shingles. When leaks show after repeated freezing and thawing, ice dams are likely. Meltwater can back up under shingles where no ice-and-water shield was installed over the sheathing near the eaves.
Some “leaks” follow sunny winter mornings, even with no recent rain. Warm interior air can condense on cold sheathing if attic ventilation is poor or if insulation baffles block soffit vents. In that case, frost forms on the underside of roof decking overnight and then drips when the sun warms the roof. Improving the balance between soffit intake and ridge vent exhaust, sealing attic air leaks around recessed lights, and insulating bathroom fan ducts can stop this moisture without opening the roof.
-
Roof Details With Higher Leak Risk
Most roof leaks originate at changes in plane or penetration points rather than in the shingle field. Step flashing at sidewalls is a frequent failure point when individual L-shaped pieces are missing, corroded, or improperly overlapped. Chimney counterflashing can separate from mortar joints, letting water run behind apron flashing. Pipe boots often crack where the rubber collar seals around the vent stack. Skylight curbs can collect debris along the uphill side if the saddle or cricket is undersized. Valley metal may rust or warp, and nail pops leave tiny holes in areas with high sun exposure where seal strips have aged.
Resist the urge to smear caulk on everything. Heavy beads of roof cement can trap water behind flashing and make later repairs harder. Replace a split boot; don’t just coat it. Cut in loose counterflashing and fit it with new gasket material, rather than gluing it to brick. For a valley that ponds due to shingle overhang, trim the shingles back from the valley centerline and reinstall them with proper fastener placement to restore drainage. Use temporary sealant only for emergency patches intended for short periods, not as a permanent substitute for properly layered metal and underlayment.
-
Safe Checks in the Attic and Exterior
Start inside on a dry day with a good flashlight. In the attic, follow discoloration, darkened sheathing, or rusty nail tips to the highest damp point. Look around pipe penetrations, around the chimney, and under valleys for water trails. Compressed or matted insulation can mark repeated wetting. If you see daylight at roof penetrations, that opening likely grows during storms. Also check that bathroom and kitchen vents terminate outdoors and not into the attic. On the ceiling below, pierce any bulging paint with a pin to relieve pressure safely into a bucket and prevent a sudden ceiling collapse.
From the ground, use binoculars to scan for missing shingles, lifted tabs, granule bald spots in valleys, and exposed nail heads on ridge shingles. Look for cracked pipe boots, gaps in counterflashing, and shifted ridge vent sections. Check gutters and downspouts for clogs that force water onto fascia and under the first course of shingles. Confirm that drip edge is installed above the fascia and beneath the underlayment. Do not climb on a wet or steep roof. Wet asphalt shingles are slick, and walking on them can break seal strips and scuff granules, creating new problems.
When to Patch and When to Rebuild the Detail
Some issues are appropriate for targeted fixes. You can fix a single nail pop by removing the shingle fastener, sealing the hole, placing a new nail in the proper location, and replacing the shingle if it cracked. A brittle or split pipe boot is best handled by replacing the boot and sealing its flange under the surrounding shingles. However, staining that returns after every period of rain lasting several days or any leak around a chimney usually points to a flashing system that needs to be opened up and rebuilt with correctly lapped step flashing and new counterflashing.
There is a tradeoff between quick patches and durable repairs. Roof cement can buy time before the next storm, but it will fail under ultraviolet exposure and repeated temperature changes. Reflashing a wall or replacing valley metal takes more effort and requires dry weather, but it restores proper water shedding. After any repair, let soaked materials dry thoroughly. Remove saturated insulation, run a dehumidifier if needed, and prime stained drywall with a primer designed to block stains only after moisture readings are normal. Keep notes on weather and locations. If the next storm repeats the symptom, move from patching to reconstructing the problem detail rather than adding more sealant.
Finally, use your observations to set priorities. A slope exposed to strong winds with lifted shingles and a cracked boot is a higher risk than a faint ring beneath a bathroom fan on a frosty morning. Matching the symptom to the roof detail, and the detail to the recent weather, turns guesswork into a focused plan. That approach reduces interior damage, prevents conditions that encourage mold in insulation and sheathing, and helps ensure the next repair you authorize solves the right problem.