
A demo video sounds like a bigger job than it actually is. Small teams put it off for exactly that reason, thinking it’ll get done once things slow down.
Reality check? Things rarely slow down, and the product page keeps running on a single still photo in the meantime.
So they wait, picturing another shoot for the demo.
What most small businesses miss is that they’re not “starting from zero”. They already have a lot of already-shot footage that can be used for product demos.
For instance, a phone clip from testing the product, a screen recording made for a customer, a few stills shot for the listing: that’s often enough to work with already.
Using it saves real time at launch, when every day matters.
And this is where AI changes the workflow. Instead of turning those scattered assets into another full production project, you can feed them into an AI video tool and generate a usable product demo in seconds.
Why Speed and Repeatability Matter in Workflow More Than Cinematic Production
A product demo has a different job than a cinematic product video. What matters most is clarity and demonstration. Someone watching should understand how it works within a few seconds.
That doesn’t make production quality “irrelevant”. It just means not every demo needs “brand-film treatment”.
- Speed makes demos practical. A new shoot, a planning session, editing, revision rounds- stack all of that on top of a simple clip and it’s easy to keep pushing off. A lighter workflow skips most of that and still gets something usable out the door.
- Repeatability matters as the catalog grows. Today it’s one product. Soon it’s a new SKU, a variant, a seasonal drop, each needing its own clip. Rebuilding the whole process from scratch every time isn’t sustainable. Following the same basic setup is.
- The real goal is consistent, useful content. Keep the structure familiar; swap out the product, the footage, the message. That’s what keeps demo creation from turning into a separate production project every single time.
5-Step Workflow for Creating a Product Demo Without a Professional Studio
Let’s understand this with a hands-on test on a product demo video for a consumer electronics brand for two products: wireless earbuds and overhead headphones.
Step 1: Source your images and clips
It’s better to start with what already exists.
- Hero/product image: A clean shot where the product is clearly visible.
- Close-up: A tighter image showing an important detail, such as the finish, controls, texture, or construction.
- In-use image: The product being worn, used, or shown in its intended setting.
- Optional second angle: Another view that helps show the product accurately or gives the AI more visual reference.
Although none of it was filmed as marketing content, that doesn’t mean it can’t become useful raw material for a demo. That’s the entire input needed. A video just enough to give the next step something to work with.
Step 2: Script the Beats
A demo clip doesn’t need a full script, just a running order, a few beats decided ahead of time, so raw clips don’t play back in whatever order they happened to be shot. Most demo clips work with four:
- Hook: the first 2 or 3 seconds, usually a close-up on whatever makes someone stop scrolling.
- Feature: the detail that sets the product apart.
- Use-case: the product being worn, held, or used, so it reads as real, not staged.
- CTA: a final frame or overlay pointing to where it’s available.
For the earbuds, that plays out simply. A close-up on the colorway first, then the shape or finish that makes this drop different, then a shot of them worn, then a closing frame with a link.
Once the structure is set, it doesn’t need rebuilding next time. The same four beats work for the next drop too, just with new product assets in the same order.
Step 3: Turn the Product Assets Into a Finished Video
Add your product images and key selling points to an AI video tool built for this. For this workflow, upload the close-up and in-use shots to Designkit’s product video generator.
Designkit uses those product materials along with the selling points you provide to generate the video, including the scene arrangement, motion, captions, and music.
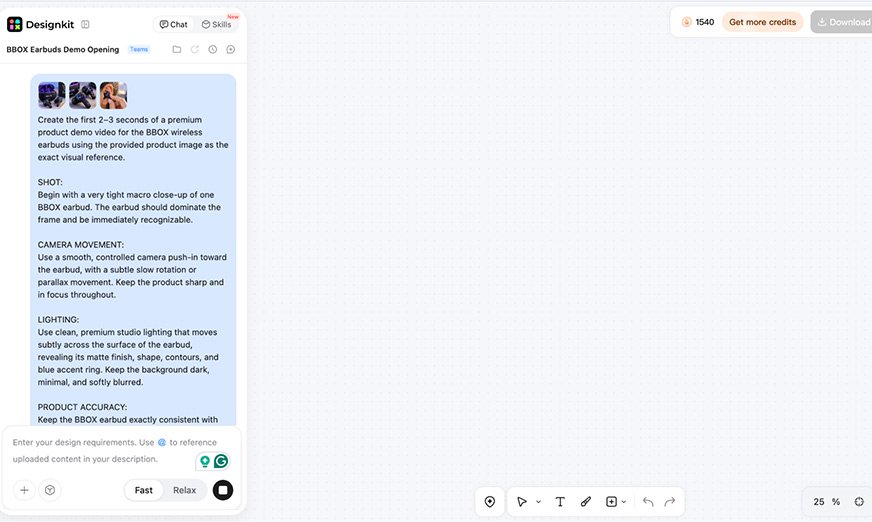
If you’re working with several product images, add the useful angles together rather than treating each image as a separate project.
The goal is to give the tool enough product reference material to show the item clearly throughout the video.
From there, choose the type of product video you want. Set the output according to where the clip will be used.
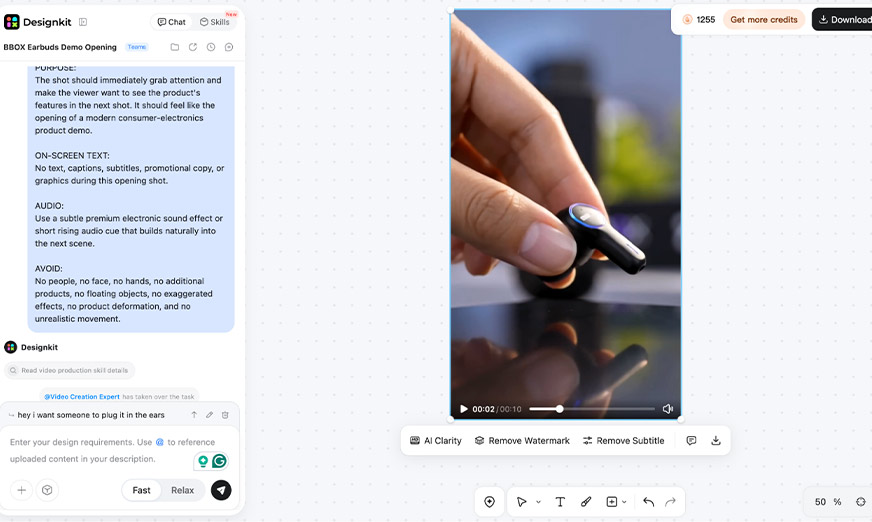
Points to remember:
- Keep the sequence aligned with the four beats you planned rather than asking the AI for a completely unrelated concept.
- A short demo can give each beat roughly 8–10 seconds, depending on the total length and how much there is to show.
- Aspect ratio depends on where it’s headed. Vertical for Reels, TikTok, and Stories. Square for a feed post. 16:9 if it’s going on a website or YouTube instead.
The motion looked natural, and the earbuds didn’t take on an overly plastic or artificial finish. The tool can generate the first draft from the uploaded product materials, so you don’t need to assemble the scenes manually in a conventional video editor.
Step 4: Refine the Output Before It’s Final
The first generated clip is rarely the one that goes live. Treat it as a draft, not a finished asset. A few things worth checking on that first pass:
- Does the hook actually land in the first second? If the opening shot feels slow or unclear, adjust the prompt or replace the opening product asset with a stronger close-up.
- Is the pacing even across beats? If one beat feels rushed and another drags, refine the generated video rather than accepting the first version.
- Do the design details still read clearly? Zoom in on the colorway and finish at actual size. If the AI has changed or softened an important product detail, replace the source asset or regenerate the draft.
Most of these are small adjustments. Not a full redo.
Now, preview the result, replace materials, adjust details, and generate further versions rather than requiring you to start the entire process from scratch.
Step 5: Reuse the Same Setup for the Next Product
Once one demo clip is done, the next one shouldn’t start from scratch. The beats, pacing, and aspect ratio already chosen carry over directly; only the product assets and selling points change.
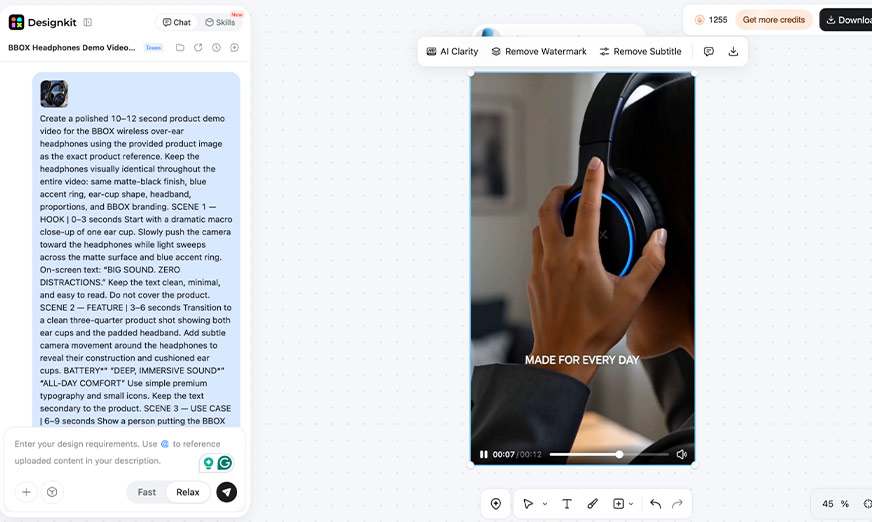
Say the same earbud brand adds a second colorway a month later. The “four-beat structure” from Step 2 still applies.
The close-up shots and in-use images get swapped for the new colorway, the relevant selling points are updated, and the new assets can be run through the same workflow to create a product video.
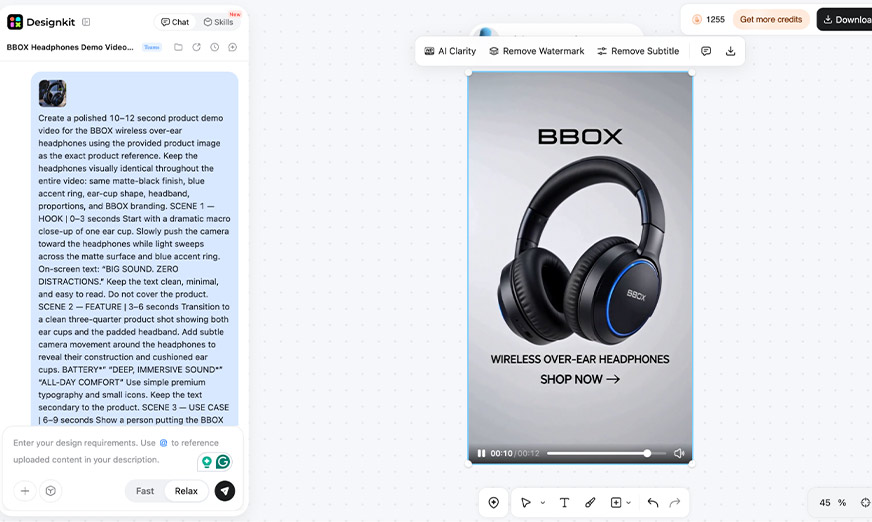
| Quick observation: After replicating the same workflow for overhead headphones, the product details stayed clear enough to work as a demo, with only minor tweaks needed to the pacing. |
The point isn’t to make every product video identical.
It’s to have a repeatable starting structure, so creating the next one means changing the product inputs rather than rebuilding the production process.
Studio vs. Small-Team Workflow
| Task | Studio Approach | Lean Workflow |
| Getting usable footage | Schedule and wait for a shoot | Use clips and stills already on hand |
| Deciding what the clip should show | Plan and storyboard from scratch | Apply the same four-beat structure every time |
| Producing the actual clip | Editor handoff, revision rounds | Generate directly from stills, no editor needed |
| Getting it ready for every platform | Resize and export separately per channel | One generation, multiple aspect ratios |
| Scaling to the next product | Repeat the full process from the start | Reuse the same setup, swap in new footage |
Final Thoughts
Good video used to require capital-intensive production. Gear, a crew, post-production expertise most small teams couldn’t justify.
That barrier is collapsing, and what replaced it isn’t skill. It’s turnaround time.
A brand that ships a rough clip on launch day, before the algorithm’s visibility window closes, ends up ahead of one still waiting on a final render two weeks out.
By then, the ranking boost and the early conversion window are both gone. That’s the real gap now. It was never about better equipment.
It’s closing because a lean, 2-person team can match the output velocity of a much larger one, through a shorter pipeline from raw footage to a “publish-ready” asset.