Fitting an ADU on a Tight Lot: How Setbacks, Utilities, and Access Shape the Design

Small lots can accommodate an accessory dwelling unit, but only when the design starts with the site’s actual limitations. On constrained parcels, the decisions that determine whether an ADU works are not cabinet finishes or flooring. They are setback requirements, the location and depth of the sewer lateral, access for deliveries and construction, and where rainwater will go once a new roof is added. This article explains how site constraints can guide smarter design choices. By mapping the buildable area, confirming utility pathways, planning construction access, and choosing foundations and drainage methods carefully, homeowners can turn a tight backyard into a compliant, practical, and comfortable ADU.
-
Confirming Buildable Area: Setbacks, Easements, and Height Limits
Start by identifying the buildable envelope. Measure from recorded property lines and apply the required side, rear, and front setbacks. Plot utility and access easements that must remain unobstructed. Check local requirements for lot coverage, building height, and any daylight or shadow plane rules that limit wall height near property lines. Add tree protection areas if mature roots or canopies are present.
Seeing these restrictions together reveals where the ADU can realistically sit. Professionals who focus on ADUs, such as those behind myadu.com, work within the same zoning and site constraints, which is why this step should come before developing a detailed floor plan.
A common mistake is sketching a layout from an assessor’s map or an existing fence line. Those references may not accurately represent legal property boundaries. If boundary markers are missing or uncertain, a professional survey may be appropriate before design work proceeds.
Underground utilities should also be located before excavation begins. Overhead lines, nearby structures, shared driveways, and neighboring building projections can affect construction access, crane placement, roof design, and window locations. Once the actual buildable envelope is established, the footprint and roof form can be developed around the site rather than forcing a preferred design into an unsuitable space.
-
Routing Utilities Without Surprises: Sewer, Water, Power, and Gas
Sewer routing is one of the most important utility decisions. Locate the existing sewer lateral and cleanout, then confirm how the new ADU can connect according to local plumbing requirements. The depth, slope, and condition of the existing line can influence where bathrooms and kitchens are placed. When plumbing fixtures are grouped along a shared wall, drain and supply runs may be shorter and easier to coordinate.
If gravity drainage is not practical, additional equipment may be required, but those decisions should be made by qualified professionals familiar with local codes and the specific site conditions. Electrical service should also be evaluated early. A load calculation can help determine whether the primary home’s electrical service can support the ADU or whether an upgrade is needed.
Utility trenching should be coordinated so electrical, water, sewer, and gas lines maintain the clearances required by applicable codes. Aligning utility routes with accessible side yards may also reduce unnecessary excavation and help avoid tree roots or existing hardscape.
An all-electric ADU can simplify some utility coordination by eliminating the need for a new gas line, but it may increase electrical demand. Appliances such as heat pumps, induction ranges, and electric water heaters should be included in the load calculation. Whether the ADU uses gas, electricity, or a combination of both, planning sleeves, conduit routes, and service pathways before concrete or decking is installed can prevent costly modifications later.
-
Access for Construction: Deliveries, Cranes, and Neighbor Impacts
Construction access can influence whether an ADU is built using conventional framing, panelized components, or modular construction. Measure side yard widths, gate openings, and clear paths to the backyard. Account for low roof eaves, tree branches, fences, and overhead utility lines. If modular or large prefabricated components are being considered, crane access and lifting requirements should be evaluated by qualified professionals. Street access, equipment placement, load limits, and overhead hazards all affect feasibility.
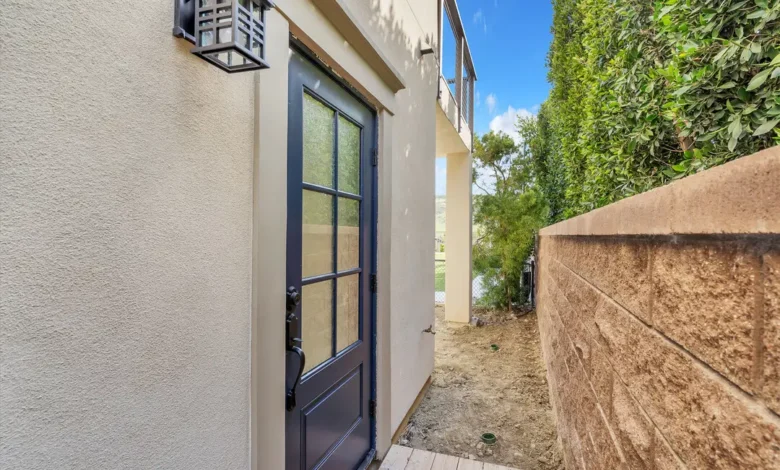
When side yard access is narrow, smaller prefabricated panels or conventional on site framing may be more practical. In some cases, temporarily removing fence sections can improve access, provided the work is coordinated properly and neighboring property is protected.
Staging also matters on small lots. Plan where construction materials, waste containers, portable toilets, and equipment can be placed without blocking driveways, sidewalks, or emergency access. Some projects may require street use permits, temporary traffic controls, or specific delivery windows. These requirements should be checked with the local jurisdiction before construction begins.
Protect trees and landscaping where possible, particularly when heavy equipment or material storage could compact soil around roots. Clear communication with neighbors about delivery schedules and temporary access changes can also reduce disruption during construction.
-
Foundation and Drainage Choices on Small Sites
Foundation design affects building height, excavation, drainage, and site disturbance. A slab foundation may work well on a relatively level site and can help keep the finished structure lower to the ground, but it requires proper subgrade preparation, moisture control, and threshold detailing.
Raised foundations can adapt more easily to sloped lots and may reduce the amount of excavation required in some situations. Other foundation systems may be appropriate where access is limited, soil conditions are challenging, or tree roots need additional protection. The final choice should reflect site conditions, engineering requirements, local codes, and the ADU design rather than convenience alone.
Roof drainage should also be planned before drawings are finalized. Gutters and downspouts need an approved discharge location. Depending on local rules, this may involve an infiltration area, drainage system, or another approved stormwater solution. Permeable paving, swales, and rain gardens may help manage runoff while preserving usable outdoor space. However, the appropriate drainage strategy depends on soil conditions, site slope, local stormwater requirements, and available space.
Adding patios, walkways, and other hard surfaces along with the ADU can increase the total impervious area on the property. That may affect stormwater requirements, so these improvements should be considered as part of the overall site plan rather than added later without review.
-
Right Sizing the Plan: Unit Width, Roof Form, and Windows
Once the buildable area, utilities, and construction access are understood, shape the building around those conditions rather than forcing a predetermined plan onto the lot.
A narrower footprint may help preserve required setbacks or protect a tree root zone. A shed roof may provide useful interior height while responding to nearby property lines and height restrictions, depending on local requirements.
Grouping the kitchen and bathroom near each other can simplify plumbing and reduce the distance utility lines must travel. Privacy also matters on small lots. Windows facing neighboring living areas may need higher sill heights, obscured glass, clerestory designs, or different placement to bring in daylight without creating unnecessary privacy conflicts.
For example, an ADU facing a neighbor’s deck may work better with larger windows oriented toward the interior yard and smaller or higher windows along the shared property side. Skylights can also introduce daylight where conventional windows are limited. These decisions often improve both compliance and daily comfort.
Let the Site Constraints Shape the ADU
A tight lot does not automatically mean the ADU must feel compromised. The most successful designs usually begin with accurate site information rather than a preferred floor plan.
Start with a scaled site plan showing property lines, setbacks, easements, utilities, trees, drainage paths, and construction access. Confirm sewer and electrical conditions early, and determine whether an all electric or mixed-fuel design fits the available utility capacity and project goals.
Choose a construction method that matches the actual access available, whether that means conventional framing, smaller prefabricated components, or another approach. Select a foundation that responds to slope, soil, drainage, and root conditions.
When setbacks, utilities, access, drainage, and site conditions guide the layout, roof form, and window placement from the beginning, the ADU is more likely to fit the property, satisfy local requirements, and avoid costly changes during construction.