

Julianna Farrait became widely known because of her long and troubled relationship with Frank Lucas, one of the best-known drug traffickers in Harlem history. Her life changed in a huge way after meeting him. She went from a private life linked to Puerto Rico to a world filled with money, luxury, crime, police raids, and prison.
Her story is not only about being Frank Lucas’ wife. Julianna Farrait also faced legal trouble of her own and became part of several major events connected to the Lucas family. Their life together included expensive clothes, large amounts of money, family struggles, arrests, separation, and years spent dealing with the results of Frank’s drug business.
The 2007 film American Gangster brought even more attention to their story. Still, the movie changed some names and events, so it should not be treated as a perfect record of what really happened. In this article, we will look at Julianna Farrait and Frank Lucas, their marriage, children, wealth, crime, and family life while also pointing out details that remain unclear.
Julianna Farrait’s Quick Bio
| Detail | Information |
|---|---|
| Full Name | Julianna Farrait |
| Also Known As | Julie Farrait, Julianna Lucas |
| Born | Around 1941 |
| Birthplace | Puerto Rico |
| Nationality | Puerto Rican |
| Known For | Wife of Frank Lucas |
| Marital Status | Widowed |
| Husband | Frank Lucas |
| Marriage | Reportedly married in 1967 |
| Wedding Place | San Juan, Puerto Rico |
| Children | Part of a family of biological children and stepchildren |
| Known Child | Francine Lucas-Sinclair |
| Legal History | Faced several drug-related cases and served prison time |
| Movie Connection | Inspired the character Eva in American Gangster (2007) |
| Husband’s Death | May 30, 2019 |
| Current Status | Keeps a private life; limited reliable public information is available |
Who Is Julianna Farrait?
Julianna Farrait, sometimes called Julie Farrait, is best known as the wife of Frank Lucas. Most reports say she was born in Puerto Rico around 1941. There is very little clear public information about her life before Frank, which is one reason many parts of her early story are still hard to confirm.
She became known to the public because of her connection to Frank Lucas and later because of her own legal problems. Frank built a large heroin business in Harlem during the 1960s and 1970s. As his wife, Julianna lived close to the money, danger, and attention that came with his criminal life.
Some reports describe Julianna as a former homecoming queen when she was young. This is different from saying she was a major beauty queen, a claim that is often repeated online without strong proof. The safer description is that she was known for her looks and had reportedly been chosen as a homecoming queen.
Over time, Julianna became much more than a quiet person standing beside Frank Lucas. She was later arrested in drug-related cases and served prison time. These events made her own choices an important part of the story, rather than making her known only as the wife of a famous criminal.
Julianna Farrait’s Early Life in Puerto Rico
Julianna Farrait’s early years are one of the least clear parts of her story. Most sources agree that she was born in Puerto Rico, but very little is known about her parents, education, or daily life while she was growing up. Some reports place her birth in San Juan, while others only say Puerto Rico.
Online stories also give very different pictures of her family background. Some say she came from a wealthy family, while other accounts describe her as a simple young woman with modest tastes. Because these claims do not match, it is better not to treat either version as a proven fact.
Frank Lucas later described Julianna as someone who dressed simply when he first knew her. According to his account, she did not wear the costly clothes that later became part of their lifestyle. He also described her as innocent and inexperienced compared with the people he knew in his own world.
Reports also say Julianna spoke only limited English when she first met Frank. This sometimes made their early talks difficult, but it did not stop the two from becoming interested in each other. Her Puerto Rican background stayed important throughout her life, especially during periods when she later returned there with family members.
How Julianna Farrait Met Frank Lucas
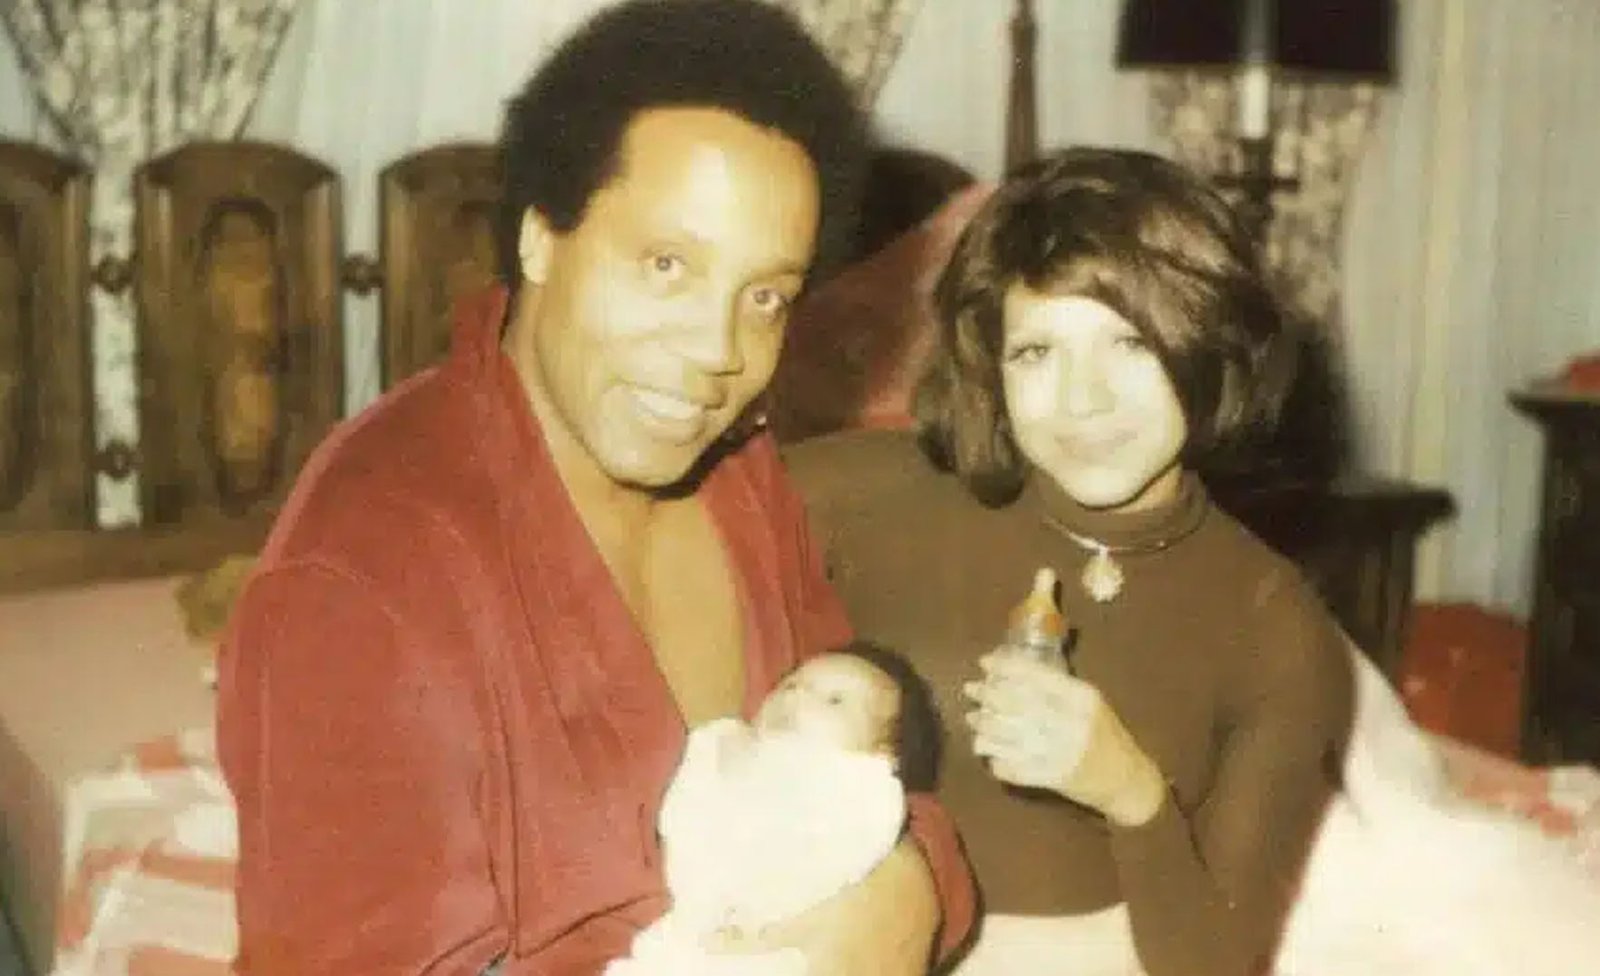
The most detailed story about how Julianna Farrait met Frank Lucas says they first saw each other on a plane heading to New York. Both were reportedly sitting in first class. Frank later said he noticed Julianna as she walked down the aisle and was immediately interested in her.
According to Frank’s version, Julianna smiled when he looked toward her. When the seat-belt sign went off, he decided to start a conversation. Their talk was not easy because Julianna reportedly knew little English, but they still managed to connect. Frank later remembered her as different from the women he normally met.
Julianna also reportedly remembered Frank as calm, confident, and sure of himself. His strong personality surprised her, but she found it attractive. Frank managed to get her New York address before they went their separate ways, although the relationship did not begin fully at that exact moment.
The two reportedly lost contact for several months. Their paths later crossed again at a club, where they began talking once more. From there, the relationship became more serious. Frank later described Julianna as innocent and “green,” meaning that she had little experience with the type of life he was living.
Not every source gives the same meeting story. Some articles say Frank first met Julianna while visiting Puerto Rico. Because the reports do not fully agree, the exact place of their first meeting remains uncertain. Still, the airplane story is the most detailed version repeated in accounts connected to Frank Lucas.
Julianna Farrait and Frank Lucas’ Marriage
Julianna Farrait and Frank Lucas reportedly married in 1967 after dating for about a year. Their wedding is said to have taken place in San Juan, Puerto Rico. According to published accounts, they were married by a justice of the peace with members of Julianna’s family and some friends nearby.
Their marriage brought Julianna into a life that was very different from the one she had known before. One story says she became excited about finding a home for the couple to rent after the wedding. At the time, she apparently did not fully understand how much money Frank already had.
Frank later joked that Julianna was looking for a rental while he could have bought the whole building. That small story shows how different their financial worlds may have been at the beginning. As Frank’s drug business grew, however, Julianna soon became used to a much more expensive way of life.
Frank also cared greatly about appearance. He wanted both himself and his wife to look successful and wealthy. He reportedly helped Julianna change the way she dressed and introduced her to more costly clothes and luxury items. Over time, the simple style he remembered from their first meeting became very different.
Their marriage was never a normal or easy one. Frank’s illegal business brought huge amounts of money, but it also brought police interest, fear, prison, and danger. Those problems would later affect not only Julianna and Frank but also the children living around them.
Their Children and Family Life
Family life is one part of the Julianna Farrait story where online sources often create confusion. Several reports say Frank Lucas had seven children connected to the household, including both biological children and stepchildren. However, sources do not always agree on which children were born to Julianna herself.
Names often linked to the family include Francine Lucas-Sinclair, Frank “Yogi” Lucas Jr., Ray Lucas, Betty Lucas, Candace Lucas, Ruby Lucas, and Tony Walters. Some websites wrongly describe all seven as children Julianna and Frank had together. Other accounts make clear that several were Frank’s children from other relationships.
One useful detail concerns Frank “Yogi” Lucas Jr. According to one account, Frank brought Yogi to live with him and Julianna after their marriage. Julianna reportedly became close to him quickly and acted as a caring stepmother. She also helped him learn Spanish after taking him to visit members of her family.
Francine Lucas-Sinclair is another important member of the family. She later spoke publicly about the difficult parts of growing up with parents connected to crime. Her childhood included both great wealth and serious hardship, showing just how quickly life inside the Lucas family could change.
Julianna reportedly tried to stay away from some parts of Frank’s business during the earlier years of their marriage. Still, family life could never be fully separated from what he was doing. The money that paid for their home, clothes, toys, and travel came from the same criminal world that later brought arrests and prison.
For that reason, it is best to describe their family carefully. Julianna was a mother and stepmother within a large family, but the exact biological links are not clearly reported in every source. What is clear is that the children were deeply affected by the choices made by the adults around them.
The Money and Luxury Around Frank Lucas
Frank Lucas became famous for the huge amounts of money he claimed to earn through heroin trafficking. At the height of his operation, he said he was making about $1 million a day. That number has been repeated many times, although exact figures from an illegal business are difficult to prove.
Frank also claimed to have millions stored in overseas accounts. Reports linked him to property, apartments, office buildings, and even a cattle ranch. Some stories say he had more than $50 million in Cayman Islands banks along with large amounts of drugs and other assets.
For Julianna Farrait, this money meant a life filled with expensive things. The couple became known for costly clothes, jewelry, gifts, travel, and other signs of wealth. Julianna later admitted that she liked expensive things and that money had an important place in the way she saw life.
Their daughter Francine also remembered the amount of luxury around her as a child. Reports say she had a train set from FAO Schwarz valued at about $10,000, a Fendi fur coat, and many toys. Some of the stuffed animals around the home were reportedly even used by Frank to hide cash.
Yet the money came with a serious cost. The more Frank spent and showed off, the easier it became for police and federal agents to notice him. His need to look richer than everyone else eventually became one of the most famous parts of his story.
The Famous Chinchilla Coat Story
One of the best-known stories about Frank Lucas involves a huge chinchilla coat and matching hat. The outfit became a symbol of the wealth that surrounded Frank and Julianna Farrait. It also became an example of how showing off too much could create unwanted attention.
Frank had reportedly attended a Muhammad Ali fight in Atlanta in 1970 and was unhappy when he noticed people wearing clothes that looked more expensive than his. He wanted to be the person who stood out the most, especially because he believed he had more money than many people around him.
At another Muhammad Ali fight in New York on March 8, 1971, Frank arrived wearing a long gray chinchilla coat with dark markings. Reports commonly value the coat at around $100,000. The matching custom hat was said to cost another $25,000, making the complete outfit worth about $125,000 at the time.
Frank also had one of the best seats in the arena. According to later accounts, even Vice President Spiro Agnew was seated farther away. Frank’s coat, seat, and confident appearance made him difficult to ignore. Law-enforcement officers already knew about him, but the display reportedly pushed even more attention in his direction.
Some stories say Julianna bought the famous coat and hat for Frank as a gift. Other versions suggest Frank chose or arranged the outfit himself. Because the reports differ, it is safer to say that Julianna has been linked to the purchase rather than claim with certainty that she bought it.
The coat story was later used in American Gangster, helping turn it into one of the most remembered parts of Frank Lucas’ public image. But the luxury would not last. Within a few years, police pressure grew, and the Lucas family was about to face one of the biggest turning points of their lives.
The 1975 Raid and Julianna Farrait’s First Jail Time
The rich life around Frank Lucas changed fast in January 1975. On January 28, police and federal agents raided the Lucas home in Teaneck, New Jersey. The search became one of the most important moments in the family’s story and brought Julianna Farrait directly into the legal trouble around Frank.
According to reports, Julianna panicked during the raid and threw suitcases filled with more than $500,000 from a window. She was also reported to have shouted for the officers to take everything. Her actions led to criminal charges and showed how quickly fear took over when the family’s private world was suddenly exposed.
Julianna later received a jail sentence linked to what happened during the raid. Some reports say she served about six months. Frank Lucas was also arrested, and his case became far more serious. The raid marked the end of the family’s most open and flashy period of wealth.
For Julianna Farrait, this was more than a short legal problem. It was the start of years filled with prison, fear, money problems, and major changes in family life. The same wealth that had once brought comfort and luxury was now tied to court cases and police action.
Witness Protection and a Harder Family Life
After Frank Lucas was arrested, reports began to spread that he was helping the authorities. Frank later denied some claims about the level of his help, but the family still faced real fear because people believed he had given information about others in the drug world.
Because of those risks, Julianna, Francine, and another child were reportedly placed in the federal witness protection program. They spent time in Albuquerque, New Mexico, and had to live very differently from before. Francine was given the last name Walters while the family tried to stay safe.
Life in witness protection was not rich or easy. Francine later described periods of serious money trouble. The family that had once lived around costly clothes and toys was now dealing with simple meals and a much smaller budget. That change showed how fast the Lucas family’s position had fallen.
After some time, Julianna and the children moved again. Reports say they later stayed with her family in Puerto Rico. This gave them some distance from New York and New Jersey, but the problems around Frank’s criminal life did not fully disappear.
Julianna Farrait’s Later Drug Cases and Prison Years
Frank Lucas was released from prison earlier than expected after working with authorities. After returning to family life, he had trouble finding normal work. Reports say he later went back to drug activity, and this time Julianna Farrait was more directly involved.
One case reportedly led to Julianna being arrested while taking part in a drug deal at the Stardust Hotel-Casino in Las Vegas. Some sources say she received a sentence of about four and a half years, while Frank received another prison term. Details about this period vary, so exact dates should be treated with care.
Julianna’s legal trouble did not end there. In 2010, she was arrested again in Puerto Rico after an attempt to sell cocaine. Federal officers had reportedly recorded a conversation in which she talked about having drugs available for sale.
The case moved forward in federal court, and Julianna was later sentenced to five years in prison. During the hearing, she asked the judge for mercy because Frank was older and in poor health. She said she wanted to spend what time remained with her husband.
The judge did not reduce the sentence as much as she hoped. Julianna was told that she needed to make better choices for herself and her family. The case was especially striking because she was already older and had gone through prison and legal trouble before.
This later arrest made one point very clear. Julianna Farrait was not only affected by Frank Lucas’ crimes. She also made choices that brought her into direct contact with the drug trade and the justice system on her own.
Julianna Farrait’s Views on Money and Danger
Some of the most revealing details about Julianna come from comments linked to her own views. She reportedly said she had always been attracted to danger. She also spoke about missing travel, expensive things, and the lifestyle she once enjoyed with Frank.
Money seemed to hold a strong place in her thinking. Reports say she believed money could bring happiness and that she valued the comfort and freedom it gave her. These comments help explain why she may have found it hard to fully leave that world behind.
At the same time, her story shows the other side of that lifestyle. The money brought fur coats, travel, gifts, and large homes, but it also brought fear, police raids, prison, family moves, and long periods of loss.
That contrast is one of the main reasons people still find Julianna Farrait’s life interesting. Her story was not only about luxury or crime. It was about how the wish for more money and excitement can carry a very heavy cost.
Julianna Farrait and Frank Lucas in Later Years
Julianna Farrait and Frank Lucas spent periods apart because of prison, legal trouble, and family problems. Still, reports say they remained connected and later became close again. Some sources say the couple reunited around 2006 after years of separation.
Frank’s health became weaker as he grew older. By the time Julianna faced sentencing again in 2012, she told the court that she wanted to care for him. Her request showed that their relationship continued even after decades of arrests, prison time, and major trouble.
Frank Lucas died on May 30, 2019, at the age of 88. His nephew said he died of natural causes. His death brought new attention to the Lucas family and also led to more questions about Julianna.
Some websites had claimed that Julianna died before Frank. However, photos from his funeral in New Jersey showed her there with family members. This makes those earlier reports clearly wrong.
As of 2026, there is very little reliable public information about Julianna Farrait’s current private life. She appears to have stayed away from public attention, and there is no clear official social media presence linked to her.
Claims about her current net worth should also be treated carefully. Some websites say she is worth $1.5 million or $2 million, but there is no strong public proof for those figures. The much larger claims sometimes linked to the Lucas family are even less reliable.
Julianna Farrait in American Gangster
The 2007 film American Gangster made Frank Lucas’ story known to a much wider audience. Denzel Washington played Frank, while Lymari Nadal played Eva, a character based partly on Julianna Farrait.
The movie showed the couple living around money, expensive clothes, danger, and the heroin trade. It also used the famous chinchilla coat story, which became one of the film’s best-known scenes.
Still, American Gangster was made for entertainment, not as a full documentary. Names, events, timelines, and personal details were changed. Some scenes were made more dramatic, and not every part of the film matches the real record.
For readers learning about Julianna Farrait, that difference matters. The film is useful for understanding why public interest in her grew, but it should not be used as the only source for her real life.
Bottom Line
Julianna Farrait’s life is closely tied to Frank Lucas, but her story has its own important parts. She moved from a private life in Puerto Rico into a world of money, crime, family pressure, legal trouble, and prison.
Her marriage brought her close to one of the most famous drug figures of the 20th century. At the same time, her own arrests showed that she was not simply standing in the background. She became part of the criminal story herself.
The family lived through huge changes. One period included fur coats, costly toys, travel, and large amounts of money. Another included prison, witness protection, fear, and financial trouble.
Some parts of Julianna Farrait’s life are still unclear, especially her early years, exact family details, and current private life. That is why the best way to understand her story is to separate well-known facts from online claims that have little proof.
(FAQs)
Who is Julianna Farrait?
Julianna Farrait is best known as the wife of Frank Lucas, the Harlem drug trafficker whose story later inspired American Gangster. She also faced several drug-related cases and served time in prison.
Did Julianna Farrait go to prison?
Yes. She faced legal trouble more than once. Reports link her to a 1975 case, a later Las Vegas drug case, and a 2010 cocaine case in Puerto Rico that led to a five-year prison sentence.
How many children did Julianna Farrait and Frank Lucas have?
Sources often mention seven children in the wider Lucas family, including biological children and stepchildren. However, reports do not always agree on which children were biologically Julianna’s.
Is Julianna Farrait still alive in 2026?
There is no widely reported reliable record showing that Julianna died. She was seen at Frank Lucas’ funeral in 2019, which proved earlier reports of her death were false. Public information about her life after that remains limited.
Was Julianna Farrait in American Gangster?
She did not appear as herself. The character Eva, played by Lymari Nadal, was inspired in part by Julianna, but the movie changed several facts and details for the story.
Katrina Sloane: Age, Family, Career, Children, and Life with Brad Marchand
Harlene Rosen: Her Life, Marriage to Woody Allen, and Where She Is Now